Continuous Integration (CI) is the process of regularly integrating software components, usually from multiple developers (team) into the main codebase. So with Continuous Integration, you mostly avoid code conflicts by merging all code from all developers more to a central branch many times a day. Historically, this process seem to have happened once a day/night (or less frequently.
Continuous Deployment (CD) is the process of regularly deploying your software into a production environment. In addition, this happens in a fresh and isolated environment, to have reproduciblity instead of “it works on my machine…”. CD usually involves checking out the code, installing dependencies, running checks like code formatting/linting, build and full test execution.
As a developer, you want “instant” feedback when the code you’ve written broke the system. Optimally, you run all necessary checks like code formatting/linting and tests locally, before you push changes to the remote codebase. To speed things up, you may run these checks only on the files you’ve actually changed.
React Native is a way to write fully-native mobile apps for iOS and Android in one shared JavaScript/TypeScript codebase. The underlying build system is a normal iOS and Android project, with the addition of needing a JavaScript execution environment and libraries to render your bundled JavaScript code into actual native components. In addition to that, you may need native modules, depending on your use case. These modules themselves can include native code, that is included into your project(s) as a Pod/Library or Gradle dependency.
Steps
The fact of having multiple factors that can easily break your build improves the significance of having a well working CI and CD pipeline. A complete development and deployment process should at least involve the following steps:
- When committing changes to your git repository, a pre-commit hook runs linting and unit/integration tests on your staged files. When successful, the changes can be pushed
- When pushed to the git repository, the CI/CD environment checks out the code
- Then the dependencies get installed (node modules and iOS Pods)
- Then the linter checks if the code is properly formatted, etc
- If you use Flow for static type checking, you may run it
- If you use TypeScript, you may run the TypeScript compiler
- Then you test your JavaScript code with unit/integration tests, usually via Jest or Mocha
- Then you run the native builds for iOS and Android
- If you have End-to-End (E2E) tests, you may run them now in an Android Emulator and iOS simulator
- Finally, you could sign & upload the apps to the Play Store and Appstore
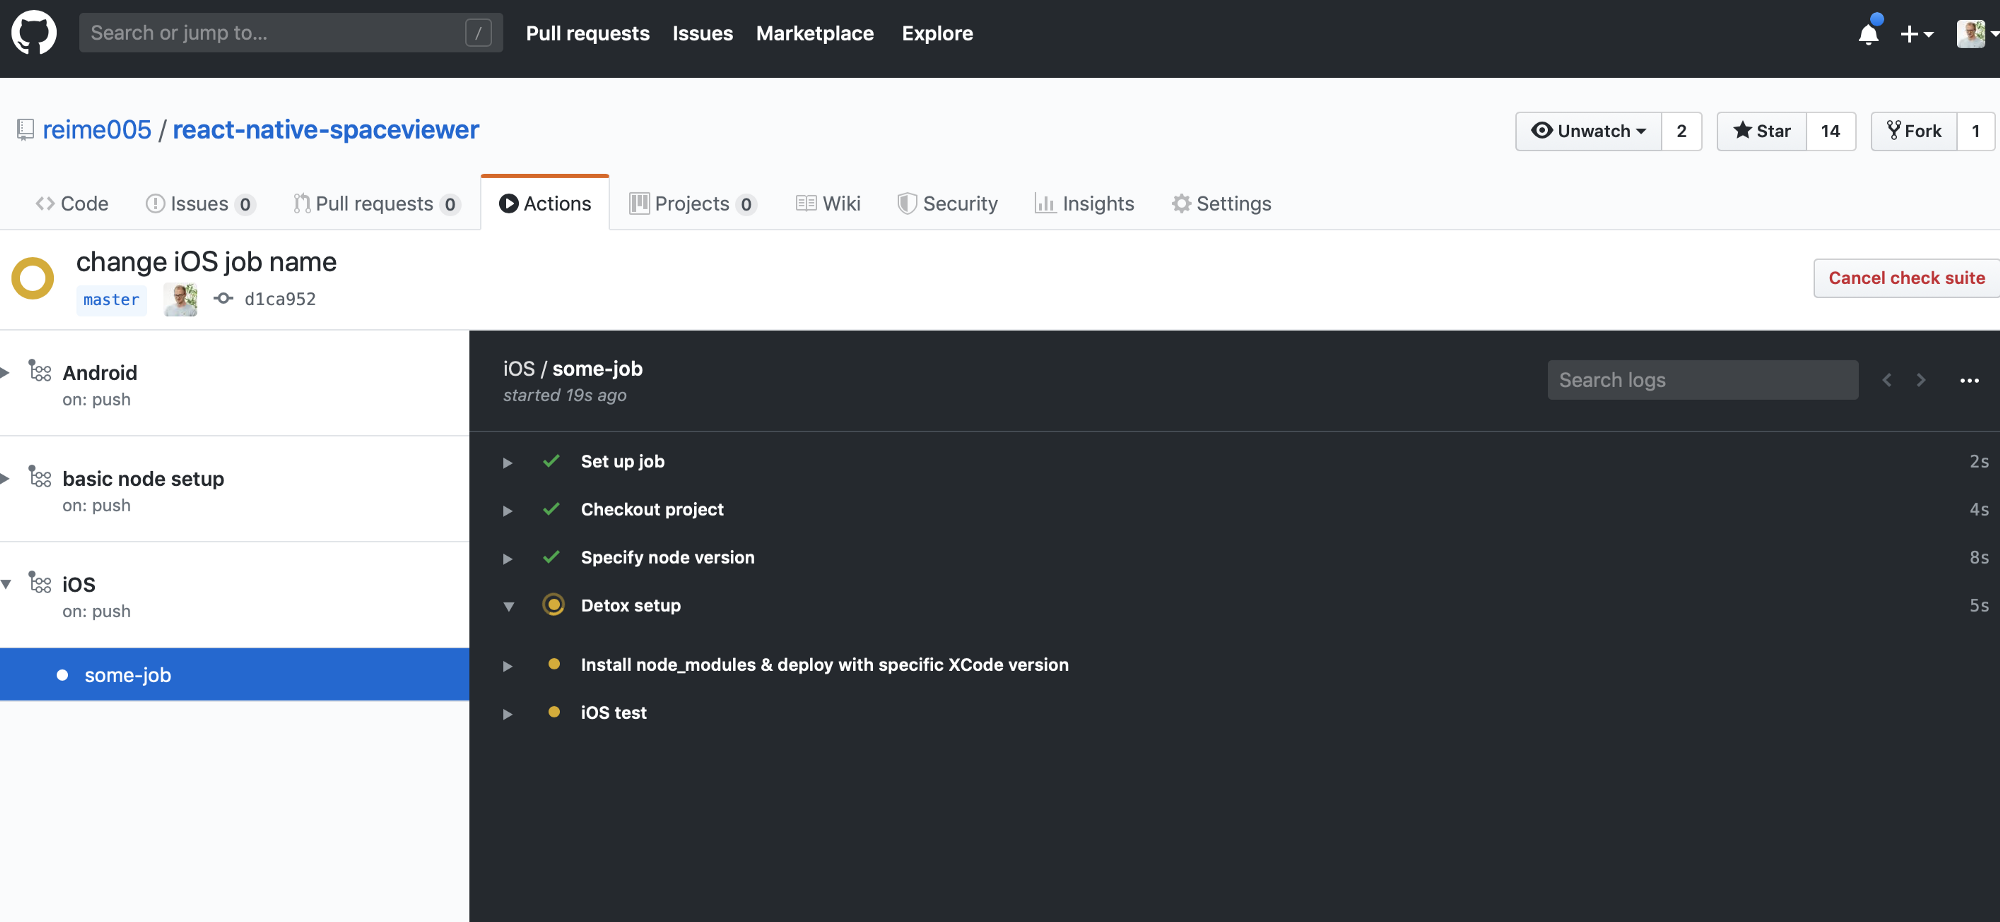
In this article I will show how I’ve setup Github Actions Workflows to run E2E tests for both iOS and Android. I’ve made good experience with integrating this into my personal app on Github.
Github actions must be setup in a folder inside .github/workflows as .yml files. Each of these workflows may run in parallel, so I set up one for iOS and Android specifically.
Decide for a run environment
Github actions provides a variety of different run environments, ranging from Windows, Ubuntu and Mac. You can find a full list of installed software here. You can also find very detailed Github Actions instructions on their page.
In order for iOS to build, you need a Mac environment, including Xcode set up. Github Actions provides a MacOS environment with multiple different Xcode already set up. So we will usemacos-latest for both iOS and Android.
| name: iOS | |
| on: [push, pull_request] | |
| jobs: | |
| some-job: | |
| runs-on: macos-latest | |
| steps: | |
| - name: Checkout project | |
| uses: actions/checkout@v1 | |
| - name: Specify node version | |
| uses: actions/setup-node@v1 | |
| with: | |
| node-version: '10.x' | |
The yml format is pretty much self-explanatory. Here, a workflow will be triggered on each push to a branch or creation of a pull request on Github. You could further limit the workflows to only be triggered on specific tags, for example.
I will only use one job in every workflow, but you could also use multiple, for example for install, build and test. Each step in a job begins with a “-” and needs either a “uses” or “run”. If you need multiple lines in a “run”, you have to add a “|”, which you will see. The first job does a git checkout of the project.
Use a specific Node Version
In some projects it is necessary to change the Node version, in order for some tools to work properly. This can be done with the actions/setup-node action. We will use Node version 10.
Setup Detox & Trigger a Build with specific Xcode Version
Since Detox will be used as the E2E test framework, it needs to be setup. Then, we want to install the node modules (including Cocoapods via postinstall script). --frozen-lockfile may be useful here, in order to make sure to use exactly the dependencies which are pinned in the yarn.lock file. We also specify the exact Xcode version to be used.
| - name: Detox setup | |
| run: | | |
| brew tap wix/brew | |
| brew install applesimutils | |
| - name: Install node_modules & deploy with specific XCode version | |
| env: | |
| DEVELOPER_DIR: /Applications/Xcode_11.1.app/Contents/Developer | |
| run: | | |
| yarn install --frozen-lockfile | |
| yarn build-detox-ios |
Run iOS E2E tests
As a last step for iOS, we may start the Detox E2E / instrumentation tests. This should automatically start the iOS Simulator with the specific device defined in your Detox configuration.
| - name: iOS test | |
| run: | | |
| npx detox clean-framework-cache && npx detox build-framework-cache | |
| yarn test-detox-ios |
Specific Java Version for installing the Android Emulator
Specifically for the Android avdmanager to work, we have to make a change in the Java installation. For that, we can use the joschi/setup-jdk action. After that, the specific Android Emulator image can be downloaded and the virtual device be set up.
| - name: Use specific Java version for sdkmanager to work | |
| uses: joschi/setup-jdk@v1 | |
| with: | |
| java-version: 'openjdk8' | |
| architecture: 'x64' | |
| - name: Download Android Emulator Image | |
| run: | | |
| echo y | sudo $ANDROID_HOME/tools/bin/sdkmanager --verbose "system-images;android-27;google_apis;x86" | |
| $ANDROID_HOME/tools/bin/avdmanager create avd -n emu -k "system-images;android-27;google_apis;x86" -b "x86" -c 1G -d 7 -f |
Starting the Android Emulator and E2E Tests
Starting the Android Emulator may take a while, depending on the resources your machine has available. Waiting for an Android Emulator to be available can be via the adb wait-for-device command. In order to wait for the boot to be finished, you can just continuously poll for the specific system message to happen. After the boot has been finished, you need to unlock the Emulator via adb shell wm dismiss-keyguard.
It may be possible that your tests hang up for some reason (especially during CI/CD setup). In such a case you want the job to time out, otherwise you may end up with a queue of pending workflows.
| - name: Android test | |
| timeout-minutes: 10 | |
| continue-on-error: true | |
| run: | | |
| mkdir -p artifacts | |
| export PATH=$PATH:$ANDROID_HOME/platform-tools | |
| $ANDROID_HOME/emulator/emulator @emu & | |
| adb wait-for-device; adb shell 'while [[ -z $(getprop sys.boot_completed) ]]; do sleep 1; done;'; adb shell wm dismiss-keyguard | |
| yarn test-detox-android |
When an E2E test fails
Detox provides the possibility to record videos (or logs) for each running test. This can be further limited to only happen if a test is failing. Using the Github Action actions/upload-artifact we can automatically upload files to a workflow and download them later in order to directly see what went wrong.
| - name: Provide videos of failed E2E tests | |
| uses: actions/upload-artifact@master | |
| with: | |
| name: android-failing-e2e-videos | |
| path: artifacts/ | |
Very important: adding a badge
You can add a badge to your README file. Suppose you have a workflow file in .github/workflows/iOS.yml. Then, code to put in your markup file should look like the following: .
![]()
You can find the full source code here.
Originally published at https://mariusreimer.com on January 11, 2021.