Many mobile apps have a unique flow of experience that the user has to go through. A tutorial or onboarding screen can help with explaining the steps that the user has to do in the app. I show roughly how I created such a screen in Flutter. The source code can be found on Github.
The Important Widgets
Widgets that I have used in this example are the following:
- SafeArea
- Column, Row, Container, AnimatedContainer
- Text, FlatButton
- SvgPicture from 'flutter_svg'
- Expanded, Padding
- PageView
Important to highlight here are the first and last one. The SafeArea helps you using only the area of the phone that is safe to be used for designing. That is, rounded borders from certain devices. With help of the PageView you can create the horizontal page scroll effect.
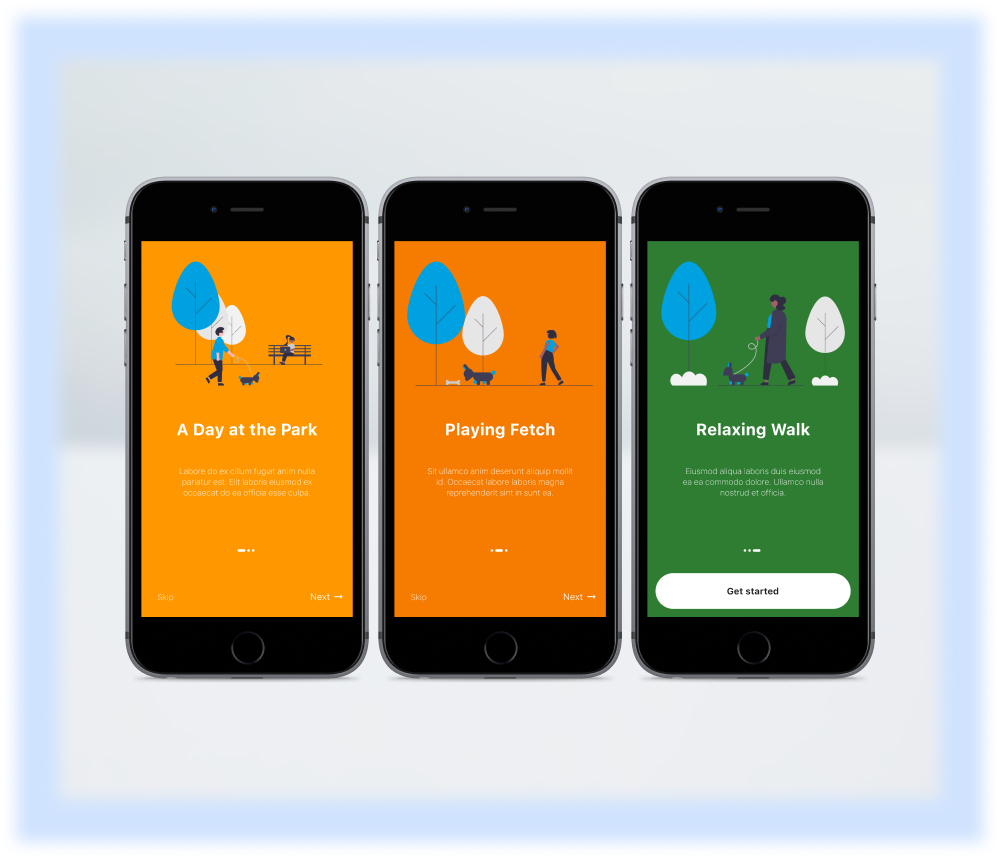
First, we want to define the data that we use for the explanation screens. For that, a specific class ExplanationData will be defined, to hold these information. Each page has a specific background color, title, short description and an image on top. The image will handled as vector graphics via flutter_svg.
| class ExplanationData { | |
| final String title; | |
| final String description; | |
| final String localImageSrc; | |
| final Color backgroundColor; | |
| ExplanationData( | |
| {this.title, this.description, this.localImageSrc, this.backgroundColor}); | |
| } | |
| final List<ExplanationData> data = [ | |
| ExplanationData( | |
| description: | |
| "Labore do ex cillum fugiat anim nulla pariatur est. Elit laboris eiusmod ex occaecat do ea officia esse culpa.", | |
| title: "A Day at the Park", | |
| localImageSrc: "assets/1.svg", | |
| backgroundColor: Colors.orange[500]), | |
| ExplanationData( | |
| description: | |
| "Sit ullamco anim deserunt aliquip mollit id. Occaecat labore laboris magna reprehenderit sint in sunt ea.", | |
| title: "Playing Fetch", | |
| localImageSrc: "assets/2.svg", | |
| backgroundColor: Colors.orange[700]), | |
| ExplanationData( | |
| description: | |
| "Eiusmod aliqua laboris duis eiusmod ea ea commodo dolore. Ullamco nulla nostrud et officia.", | |
| title: "Relaxing Walk", | |
| localImageSrc: "assets/3.svg", | |
| backgroundColor: Colors.green[800]), | |
| ]; |
The Animated Page Position Indicator
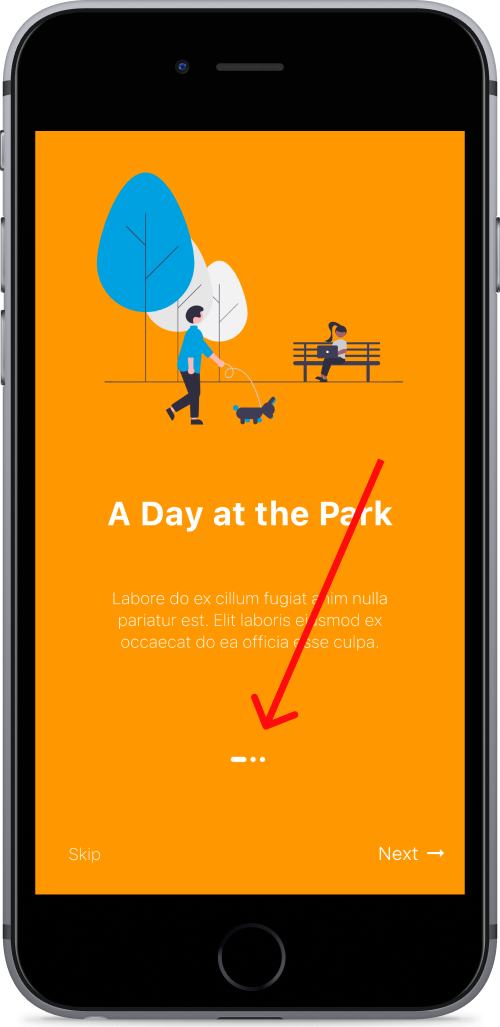
The next code snippet shows the state handling of the PageView widget, so that we can track the current page index and programmatically (when pressing on a button) jump the next page. It also shows the create function for the page indicator circles. For each page we render a specific circle, with when the current page is selected, the circle is about three times wider. This gives a better impression of where the user is currently. Using the AnimatedContainer we can achieve a simple animation effect.
| class HomePage extends StatefulWidget { | |
| @override | |
| _HomePageState createState() => _HomePageState(); | |
| } | |
| class _HomePageState extends State<HomePage> { | |
| final _controller = PageController(); | |
| int _currentIndex = 0; | |
| createCircle({int index}) { | |
| return AnimatedContainer( | |
| duration: Duration(milliseconds: 100), | |
| margin: EdgeInsets.only(right: 4), | |
| height: 5, | |
| width: _currentIndex == index ? 15 : 5, // current indicator is wider | |
| decoration: BoxDecoration( | |
| color: Colors.white, borderRadius: BorderRadius.circular(3))); | |
| } | |
| // build function | |
| } |
Lastly, you see a snippet of the horizontal PageView widget. Using the onPageChanged callback, we can track the current index, leading to a re-render of the page indicators. These indicators are generated with the help of List.generate and by using the length of the previously defined data, put into a Row widget.
| @override | |
| Widget build(BuildContext context) { | |
| return Colum( | |
| children: [ | |
| PageView( | |
| scrollDirection: Axis.horizontal, | |
| controller: _controller, | |
| onPageChanged: (value) { | |
| setState(() { | |
| _currentIndex = value; | |
| }); | |
| }, | |
| children: data | |
| .map((e) => ExplanationPage(data: e)) | |
| .toList() | |
| ), | |
| Container( | |
| margin: const EdgeInsets.symmetric(vertical: 24), | |
| child: Row( | |
| mainAxisAlignment: MainAxisAlignment.center, | |
| children: List.generate(data.length, | |
| (index) => createCircle(index: index)), | |
| ) | |
| ) | |
| // bottom buttons (not shown) | |
| ] | |
| ) | |
| } |
Originally published at https://mariusreimer.com on January 20, 2021.